
As a teen, we gathered with the boys at LAN parties in our homes and setting up the network always took the first day. For some reason, it’s not easy to ensure a computer reliably sees the shares of another. The idea of this article stemmed from this old problem and will give you a robust albeit not so easy solution to secure sharing.
My setup involves a desktop computer as a server and a laptop as a client. In another article, I’ll add an Android device as a client for backing it up over Wi-Fi. We’ll use Advanced Sharing and fake (VPN) users for access. Yes, even a phone will be able to see these shares, and no, the laptop which gets carried around the world will not leak any data to public networks. Whenever I want to share something on the laptop, I just drop it into a designated folder on the server (that is mapped to a network drive).
Please note that I’m not claiming a 1-click solution here. Despite Microsoft’s attempts at making it easy, I don’t trust the Sharing Wizard, Public folders, the now-removed homegroups, sharing with Everyone, or sharing without password protection! Secure sharing means that your folders are only shared with specific people.
VPN users for secure sharing
Wait a minute – you ask – what the hell does a VPN have to do with this? It’s a lesser-known trick to create users for sharing, without cluttering your Windows logon screen. Indeed, these users will not have a footprint in the Users directory either. Therefore, clients will not need to use actual Windows login users/passwords!
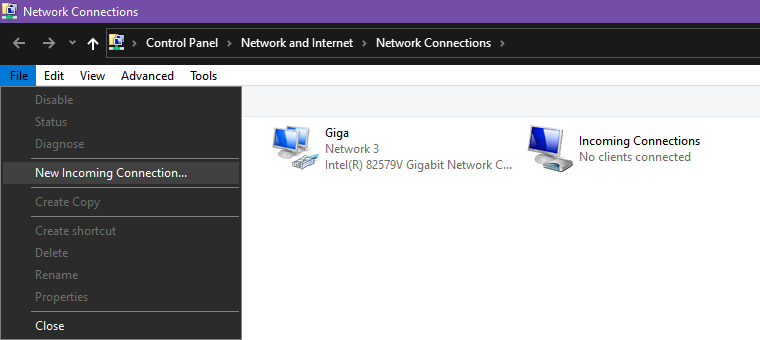
- In the Start menu search, write View network connections, and open it.
- Press Alt, then in the File menu choose New Incoming Connection…
- Click Add someone… and fill out User Name and Password and Confirm password fields.
- When asked for How will people connect? tick Through the Internet.
- Click Allow access.
- Hit F5 to refresh the Network Connections window, and you’ll see an Incoming Connections icon. You may delete this if it bothers you, as the user will remain. Still, it can be useful for managing these hidden users.
Tip: You can also manage (and delete) users opening compmgmt.msc from Run (Win+R). Find Local Users and Groups and then Users under that. For creation, I recommend the above steps.
Network profile settings
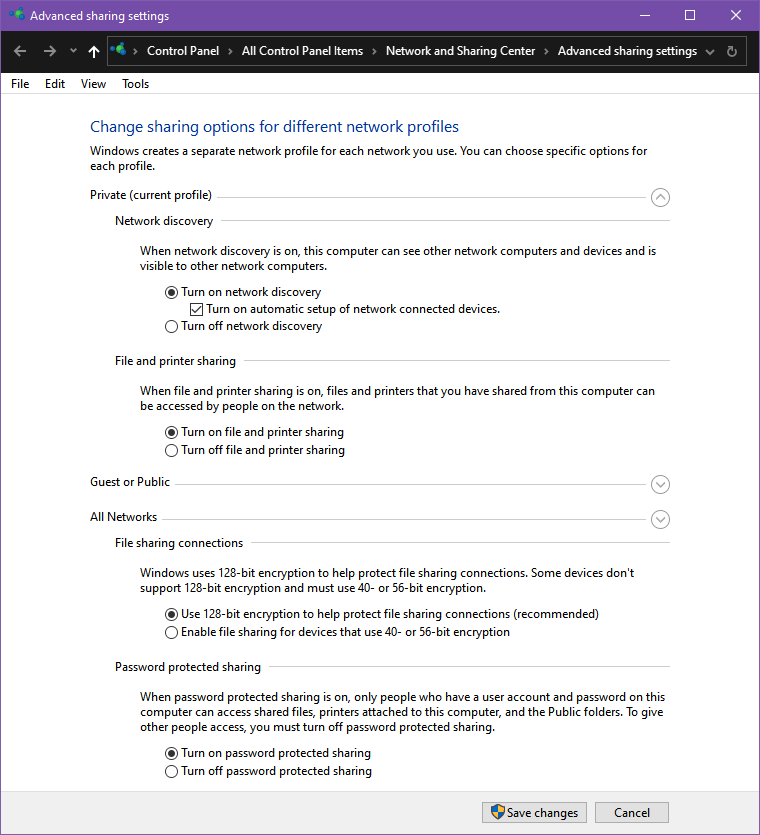
- In the Start menu search, write Manage advanced sharing settings, and open it.
- Under Private (current profile) (or the one you use for the home network), choose Turn on network discovery and Turn on file and printer sharing.
- Under All Networks, Use 128-bit encryption and Turn on password protected sharing.
- Save changes.
Switch to advanced sharing
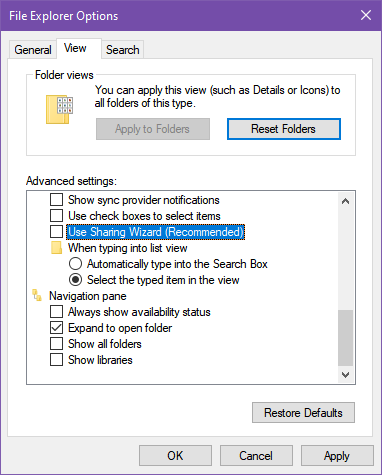
First, the sharing wizard needs to go, by unticking a well-hidden option.
- In the Start menu search, write File Explorer Options (previously called Folder Options), and open it.
- On the View tab, uncheck Use Sharing Wizard.
Secure sharing of folders
The following might seem tedious but learn the clicks, and you’ll perform these actions very quickly (for each distinct share).
- Right-click on a folder to be shared and choose Properties.
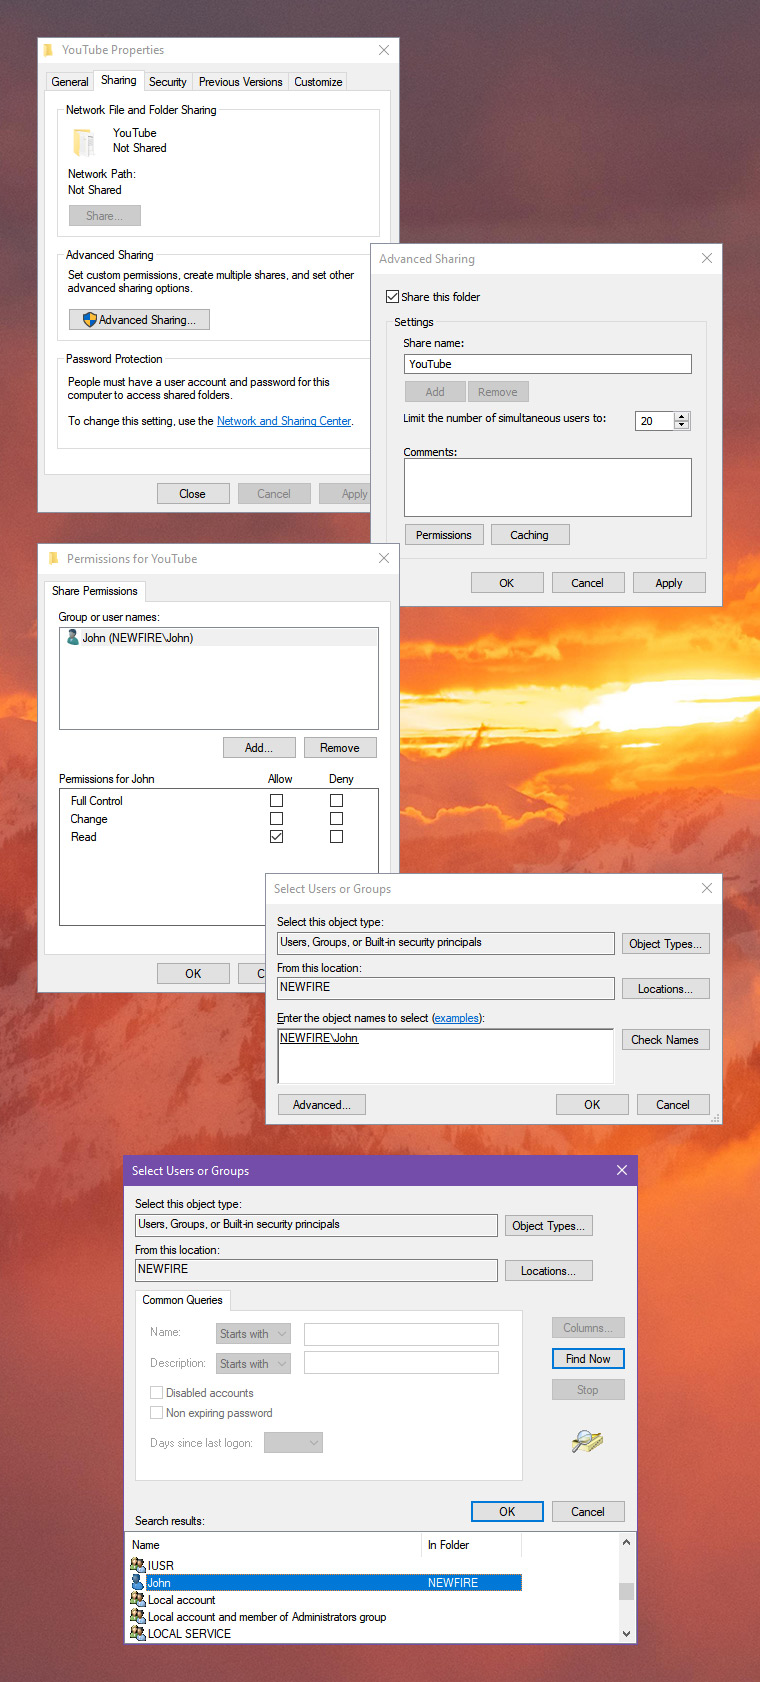
- Choose the Sharing tab and click Advanced Sharing…
- Tick Share this folder and click Permissions.
- Remove the Everyone user!
- Click Add then Advanced… then Find Now.
- In the list, choose the user you created in the previous section.
- Click OK twice to get back to Permissions. The default Read permission is usually fine. I had trouble in the past when network computers infected executable files with viruses, so only add Full Control or Change permissions if you need them.
- Click OK twice more to get back to Properties, then Close.
That was the network sharing permissions part of the story and the heart of all this. Master it and you’ll quickly create more shares. Please note:
- Any user with password access will see the shared folders meant for other people but won’t be able to enter them.
- To allow access to multiple users, just grant all the necessary permissions on a folder.
Cleaning up remnants of previous attempts
This section only applies if you have been trying things beforehand. You might be stuck with a state of cached network sessions. Perhaps you receive weird error messages that tell you to contact yourself (the network administrator). Don’t worry!
Client
These make the client forget the stored connections you might have used previously. Remove mapped network drives, close any File Explorer windows, then try the following:
- To purge remote connections, hit Win+R buttons (Run), and enter:
cmd /k net use * /del /yes - To remove stored access, find Credential Manager in the Start menu search, and discard familiar entries under Windows Credentials.
- You can also hit Win+R and run this:
rundll32.exe keymgr.dll,KRShowKeyMgr
Server
To truly reset the client’s relationship with the server and make it ask for a password again, do these:
- On the server, from Start menu search, go to View network connections.
- Right-click on the network adapter (Local Area Connection or similar) and disable it.
- On the client, in File Explorer (Win+E), try accessing the server by typing its name in the address bar like this:
\\DESKTOP. You should get an error saying Windows cannot access… - Then re-enable the network adapter of the server.
- Try connecting again with the client. It should either ask for your user/password OR deny the request outright with permission problems. If it asks for network credentials, it’s all right, but don’t be alarmed if it doesn’t. It means no “public” access to the shared folders since you don’t want people peeking into your computer!
Making (a persistent) connection
Finding the server with the often-failing network discovery is cumbersome. Just browsing the Network with File Explorer is either slow or doesn’t show the server. Typing the name in the address bar like \\DESKTOP is not a convenient long-term solution. Secure sharing doesn’t need to be a misery to use.
Therefore, I propose mapped network drives!
- On the client open a File Explorer (Win+E).
- Right-click Network on the left side.
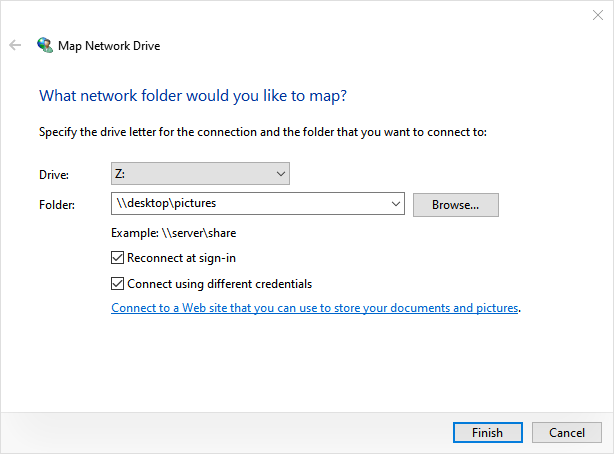
- Choose Map network drive…
- As for the Folder, use this format
\\DESKTOP\Somefolderwhich consists of the server’s device name and the folder you shared. - Check Connect using different credentials, to ensure asking for the user/pass.
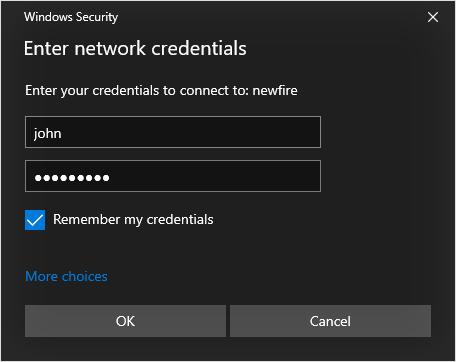
- After clicking Finish, you just need to enter the “VPN” user’s info that you created previously. Make it remember.
Tip: You can find out your computers’ name by looking for View your PC name in the Start menu search.
Note: A client can’t connect to the server using two different credentials at the same time. You’ll receive the error “The network folder specified is currently mapped using a different user name and password” – what it means is that your current session OR network drives are logged in using a different user. That’s why I recommend a prior cleanup (see the previous section). Similarly, I don’t advocate logging into the entire computer with the user/pass, but instead mapping drives to individual shares.
Troubleshooting
As a result, you can check that your login details are saved on the server by going to Credential Manager from the Start menu search, or by simply opening the server computer in the Network part of the File Explorer. You don’t compromise security for comfort, because your client will remain logged in to the server indefinitely (with some caveats).
After resuming from sleep or booting up, you might get the dreaded “Could not reconnect all network drives” error on the client machine. One might think that the “Reconnect at logon” checkbox (when mapping a drive) would remedy the problem – nope. Due to this, you can use the Registry Editor to apply a neat little fix that will delay connecting to the mapped drives until you interact with them (I prefer that).
If you have problems with secure sharing, try performing the cleanup and starting over, or restarting both server and client. Let me know in the comments if you liked this tutorial. However, I might not be able to help with specific issues as all I know about this topic is in the article already.


Comments are closed.