

You can become your shared hosting if you host multiple sites on your VPS. However, the domain name system can only resolve a host to an IP address. If you have more than one website on that IP, you need to configure your web server for virtual hosts. But I don’t want a lengthy or even a “copy-paste a config” procedure every single time I add a new site. OpenLiteSpeed VHost Templates come to the rescue, as they let you create a central configuration that your websites re-use. Also, you do everything on the friendly graphical interface! Thereby, adding new domains or subdomains won’t be a pain anymore, it’s almost as simple as doing it on cPanel.
In this tutorial, I share my experience of hosting multiple WordPress sites on Amazon EC2. In a previous article, I’ve given my reasons why I think the OpenLiteSpeed Amazon Machine Image is best for WordPress. That AMI takes care of the installation part on Amazon Web Services. However, you can follow this article even if you are on DigitalOcean or host OpenLiteSpeed yourself. It’s the Open Source edition of LiteSpeed Web Server Enterprise that some web hosting companies use, citing speed as a selling point. This process is a real-life example of how we host our sites.
What are OpenLiteSpeed VHost Templates?
There is a surprising lack of proper documentation or tutorials on the web, so I had to figure out how OpenLiteSpeed VHost Templates work by trial and error. I already knew that I needed virtual hosts, and started setting up sites one by one. I soon became angry because whenever I changed a setting, I had to replicate the same thing for the other website(s), one by one. It just wasn’t maintainable in the long run. Similar sites need almost the same configuration, so there had to be a way not to repeat myself.
OpenLiteSpeed VHost Templates are a universal collection of settings. They use a couple of variables that are specific to a site such as server paths. For instance, you probably want the same logging policy, but with each site using their respective folder for such logs. Similarly, SSL certificates are likely together somewhere on the server, differing only by name (host). VHost Templates make this setup happen.
Prepare a few things for the virtual host
You need to do these steps for every new site you wish to add. The folders are especially easy to forget, and if you don’t know about them, they can give you a headache. Treat this as a checklist. Some are not that obvious.
- DNS: Make sure that you have the domain or subdomain pointing at your web server’s IP address. Only then will a virtual host help route it to a particular directory on the server.
- Document Root: Create a directory for the site, such as /var/www/example.com, and place a file in it for testing (whatever you want so later you can see it working). For example, a .php file with
<?php phpinfo(); ?>in it would suffice. Have you seen cPanel hosts that point your main domain to /var/www/ as they think you’ll only have a single site? We don’t do that. Each site has its own folder. - Virtual Host Root: Create a corresponding directory inside OpenLiteSpeed’s folder, like this: /usr/local/lsws/example.com. If this is missing, the virtual host won’t work at all. This folder doesn’t create itself!
Creating our VHost Template for multiple sites
New template from scratch
The Virtual Host Template List looks like this. To begin creating a new one, click that + button on the right.
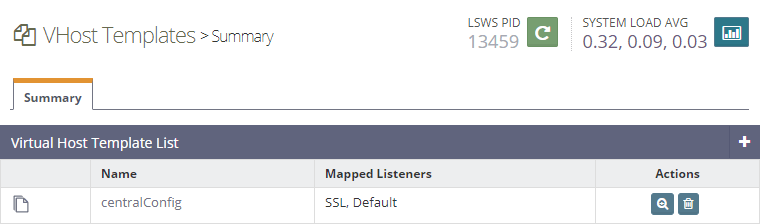
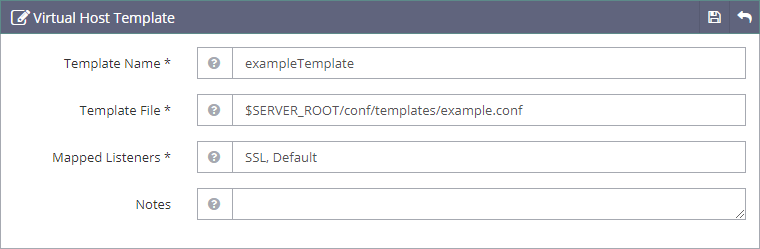
Our template is called centralConfig, and yes, you could even build upon an existing one (there are like three by default, but I prefer showing it from scratch). The Template Name is whatever you want without spaces. However, for the Template File, use the following pattern:
$SERVER_ROOT/conf/templates/example.confYou can write anything else instead of the word example. As for the Mapped Listeners, list them comma separated like this: SSL, Default.
When you click Save in the corner, you’ll need to click this error:
file /usr/local/lsws/conf/templates/example.conf does not exist. CLICK TO CREATE
General
Now that you created the template, I’ll walk you through every setting I recommend. First of all, take a look at Base and Base2 on the General tab.
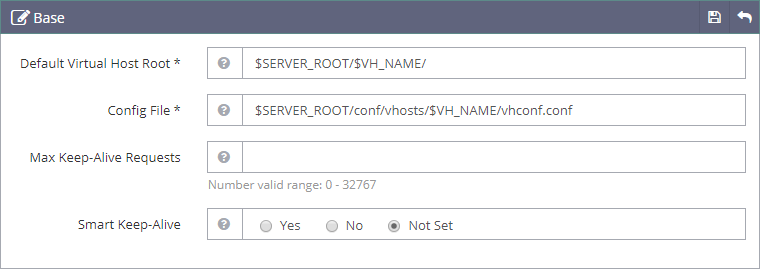
Default Virtual Host Root is essentially that folder you previously created inside the server root (/usr/local/lsws).
$SERVER_ROOT/$VH_NAME/This Config File will hold what you set up on these tabs.
$SERVER_ROOT/conf/vhosts/$VH_NAME/vhconf.confNow save that, and go to Base2:
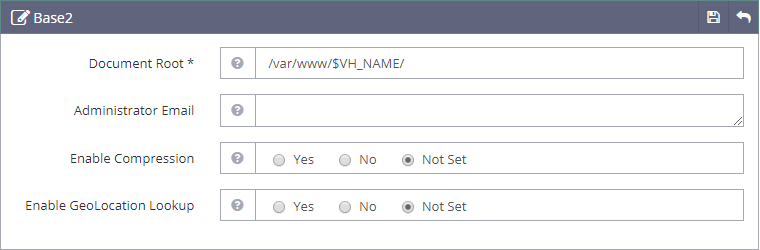
Document Root is also a directory you’ve created previously. Eventually, all these $VH_NAME variables will gain meaning! I decided to point the document roots to a location that’s easy to remember. Maybe it’s just me, but I dislike any other value. Don’t forget to save!
/var/www/$VH_NAME/Logging
Go to the Log tab, and for error logs, set the Virtual Host Log like this:
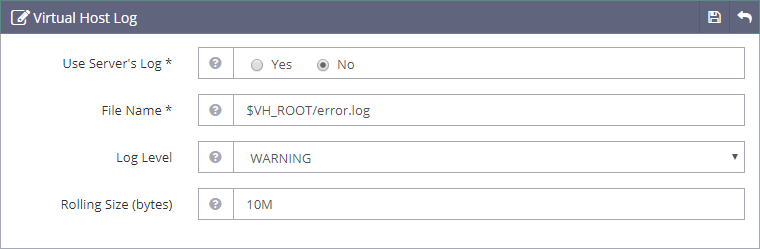
This File Name ensures that each virtual host will write the logs to that folder you created (VHost root, not the document root). Here is the value, for easy copy-pasting:
$VH_ROOT/error.logAfter that, fill out Access Log settings like this:
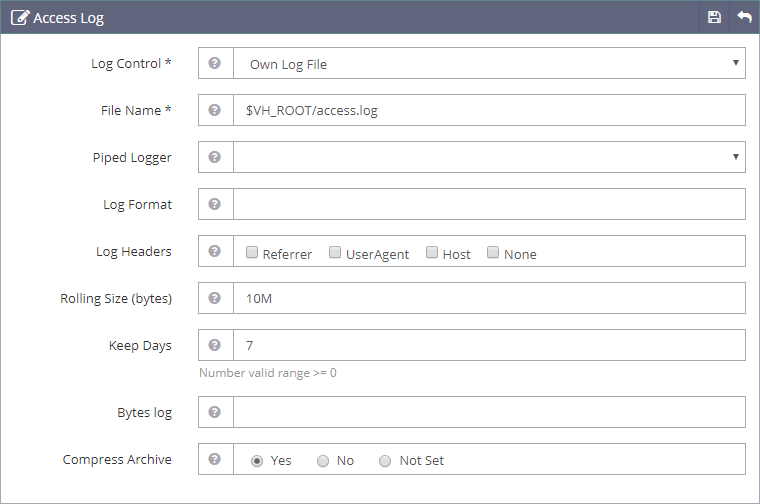
$VH_ROOT/access.logRolling and compression are handy features that keep your log file sizes small. OpenLiteSpeed can automatically delete access logs after some time. Of course, feel free to deviate from the settings that control actual logging behavior, as this is just a reasonable example.
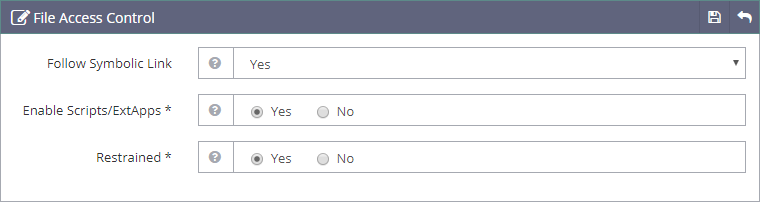
Security
Set up File Access Control like this:
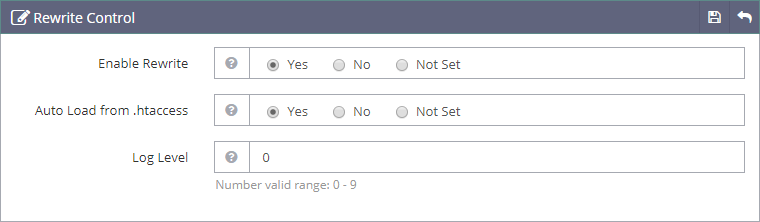
Rewrite
Set these inside Rewrite Control:
SSL
If you plan on using Let’s Encrypt, then do the following for SSL Private Key & Certificate:
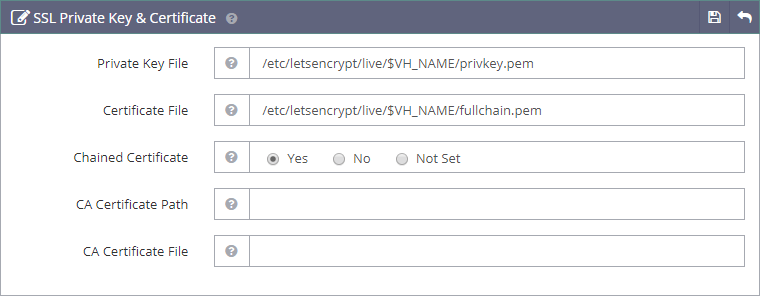
These files will only exist if you create them via Certbot, but that’s the scope of another tutorial.
/etc/letsencrypt/live/$VH_NAME/privkey.pem
/etc/letsencrypt/live/$VH_NAME/fullchain.pem
Add new domains or subdomains with Member Virtual Hosts
My favorite part is the last step that glues everything together. Notice that the regular Virtual Host List is empty, and it’ll stay that way! By doing all that above once (a simple configuration really), you avoid repeating the entire process for each site. Without further ado, open your VHost Template by clicking its name, and locate the Member Virtual Hosts area:

Eventually, that’s what you aim for. I understand it’s empty for you, so Click the + in the corner, and simply add your domain or subdomain to Virtual Host Name. That becomes the $VH_NAME variable in the paths. From now on, that brief checklist from the beginning and this step are all you need to spawn new sites. Yay!
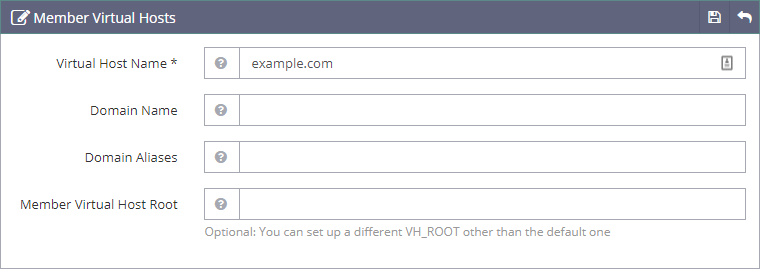
Save! You don’t even need to fill out the Domain Name field, OpenLiteSpeed figures it out. By the way, have you noticed this message?
Configuration has been modified. To apply changes, please perform a graceful restart.
Has it been bothering you? 🙂 Finally, click on the green Graceful Restart button! Now you may check your site and that test file you placed there.
Verify they work
Once restarted gracefully, go to the Dashboard and find this:
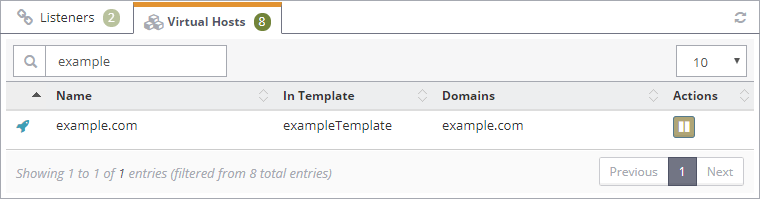
If your virtual host appears with the rocket and a pause button, it’s running properly. If not… Did you forget to save one section? Did you create the folders? I sincerely hope this tutorial helped you in some way. Until next time, don’t forget to vote below.


Comments are closed.