

I already mentioned that we use UpdraftPlus to back up our sites. That plugin is still useful and recommended. However, we switched the remote storage service from Google Drive to Amazon S3 for WordPress backups. The change coincided with our migration to AWS, and it’s working much better and with less chaos. Read the reasons why it’s better and more cost-effective for specific users.
You’ll need to know two things about AWS (Amazon Web Services). S3 is a storage service, which is a bit more advanced than consumer-grade file hosting services. They best describe IAM as:
AWS Identity and Access Management (IAM) enables you to manage access to AWS services and resources securely. Using IAM, you can create and manage AWS users and groups, and use permissions to allow and deny their access to AWS resources.
Why using Amazon S3 for WordPress Backups is a frugal approach?
Limitations of UpdraftPlus
The one problem with using Google Drive through UpdraftPlus is that every backup from all the sites ends up in the same folder. Unless of course, you buy Premium. I quickly noticed that because of the inherent structure of Amazon S3, it’s not possible to impose the same limitation. When you create an IAM user for each site, they’ll have precise access rights to whatever you want. Whereas it’s cumbersome to maintain different Google accounts just for freeloading on their 15GB plan.
Storage service prices compared
Let’s assume you are okay with 15GB of Gmail/Drive and don’t want to pay Google to have the extra 100GB for $2/mo. Also, you don’t have a 2TB DropBox plus for $12/mo. How much could you store at S3 before you reach Google One’s pricing? At $0.0245/GB, it’s about 80GB. So, unless you are heavily backing up, your costs will be minimal. You can rest assured that your backups are at a safe, secure, robust system. Furthermore, this approach gives you full control over the lifecycle of your archives, further reducing costs in case you prefer to keep Amazon S3 WordPress backups that are older than a month.
Create the Amazon S3 bucket
Once logged in to AWS, go to your S3 Management Console, and click the Create Bucket button.
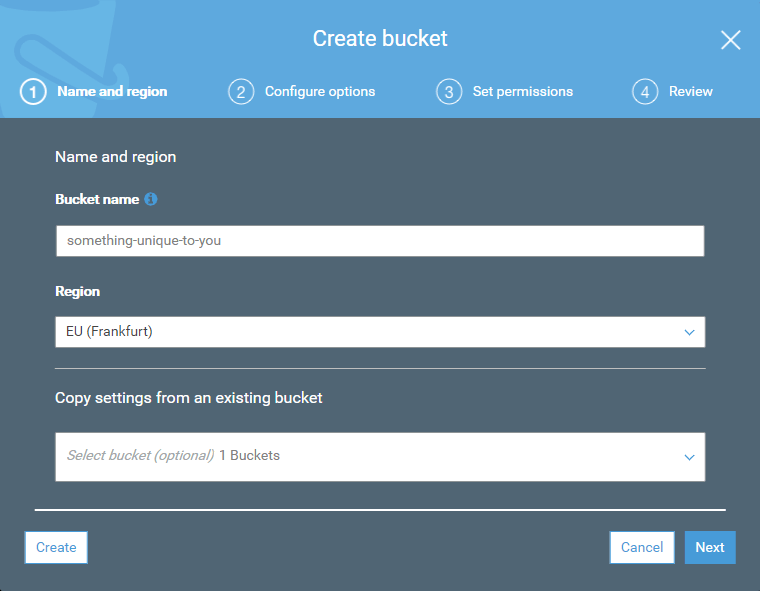
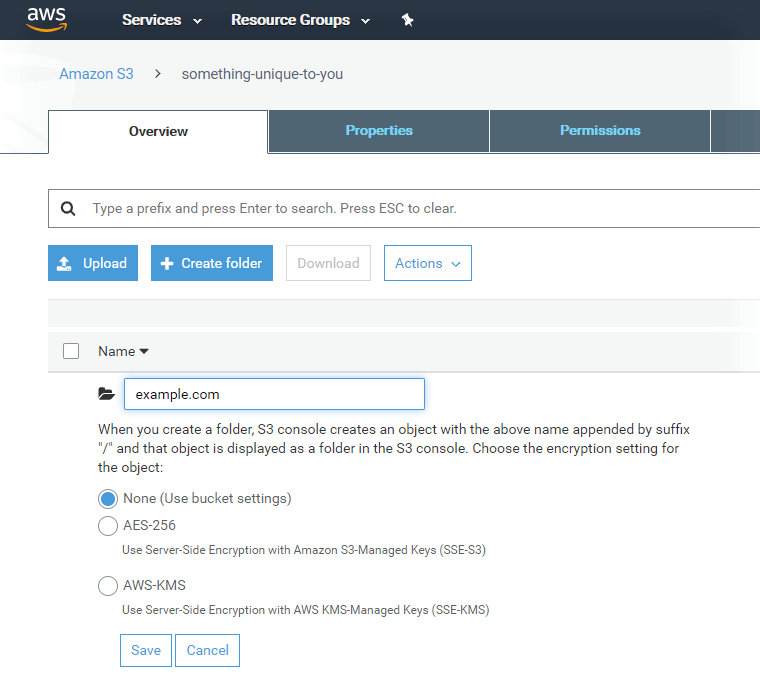
The bucket name is global like a domain name; somebody else might be using what you desired. Just come up with something unique. The region you choose affects S3 pricing and also has a data transfer cost consideration. On the following screens, just click Next, as the defaults are fine. Once created, you should see the bucket and this in the list:
Bucket and objects not public
If the lower pricing of Infrequent Access storage piqued your fancy, you could set a lifecycle policy to move files older than 30 days to that. It’s in Management -> Lifecycle in case you need it. However, for long-term archival, I choose to one-way sync backups to my computer with Syncovery (as HDD storage is still cheaper, for noncritical data). Subsequently, backups don’t need to live in the cloud for more than a month. UpdraftPlus will garbage collect them.
Finally, create a folder for your site. I advise this, as you might want to have other sites backed up to this bucket, and they should be separated accordingly.
AWS Identity and Access Management
The IAM policy
Creating a different policy for distinct IAM users of your sites makes this secure. Therefore, even if a site is hacked, the attacker can only see backups of that site and not your other ones. Open the IAM Management Console to begin, then click Policies -> Create policy. Copy paste the following to the JSON tab.
{
    "Version": "2012-10-17",
    "Statement": [
        {
            "Sid": "VisualEditor0",
            "Effect": "Allow",
            "Action": [
                "s3:ListBucketMultipartUploads",
                "s3:ListBucket",
                "s3:GetBucketLocation"
            ],
            "Resource": "arn:aws:s3:::something-unique-to-you"
        },
        {
            "Sid": "VisualEditor1",
            "Effect": "Allow",
            "Action": "s3:ListAllMyBuckets",
            "Resource": "*"
        },
        {
            "Sid": "VisualEditor2",
            "Effect": "Allow",
            "Action": [
                "s3:PutObject",
                "s3:GetObjectAcl",
                "s3:GetObject",
                "s3:AbortMultipartUpload",
                "s3:DeleteObjectVersion",
                "s3:PutObjectVersionAcl",
                "s3:GetObjectVersionAcl",
                "s3:DeleteObject",
                "s3:PutObjectAcl",
                "s3:GetObjectVersion"
            ],
            "Resource": "arn:aws:s3:::something-unique-to-you/example.com/*"
        }
    ]
}- Replace something-unique-to-you (appears twice!) with your bucket name.
- Then use your actual website host instead of example.com (appears once). Be careful not to mess up the punctuation around it as that leads to errors.
- Click Review policy, so that you can name it like ExampleUpdraftPlusPolicy (with an optional description, so you later know what this was).
- The Create policy button will end your misery.
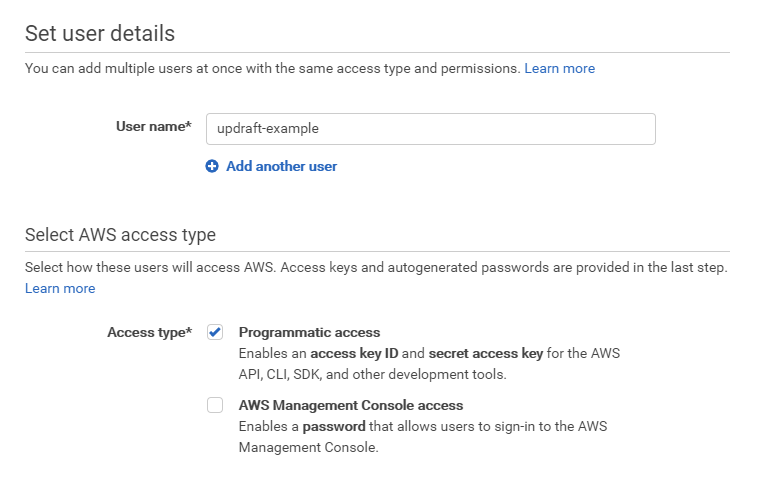
The IAM user
Go to Users -> Add user. The name is just for your eyes, and it won’t even appear in UpdraftPlus. Tick the box next to programmatic access!
On the Permissions screen, choose to Attach existing policies directly and to access the policy you created, filter by policy type: Customer managed.
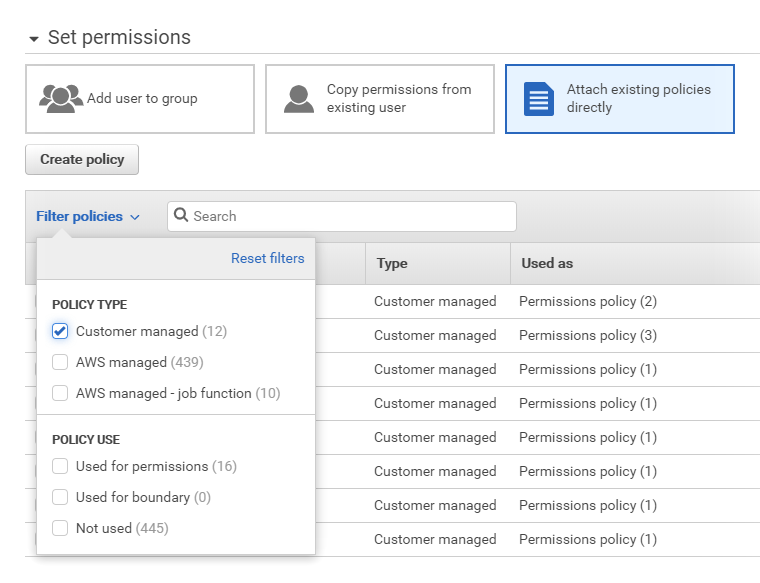
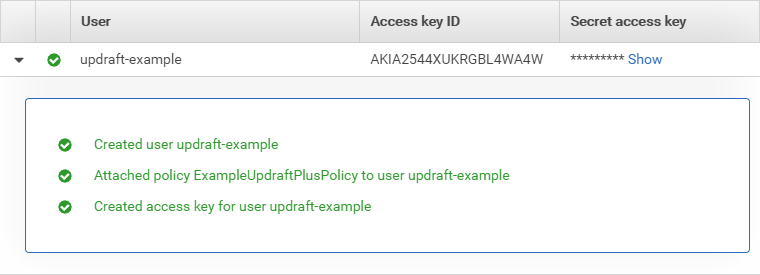
- Once you found it, tick the box next to it so you can proceed with Next, Next, Create user.
- On the last screen, make a note of the Access key ID, and Secret access key as these are the ones UpdraftPlus will need.
Configuration in UpdraftPlus
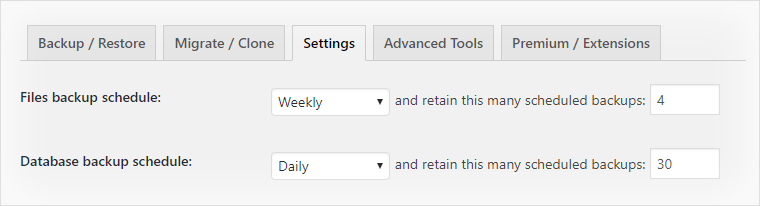
Now onto the easy part. We use this configuration, as database backups are small and quick to make, it’s a no-brainer to keep daily iterations. On the other hand, file backups on an image-heavy site might consume more space and could take more resources to create, while they rarely change.
Select Amazon S3 as the remote storage, then add the credentials and path like this:
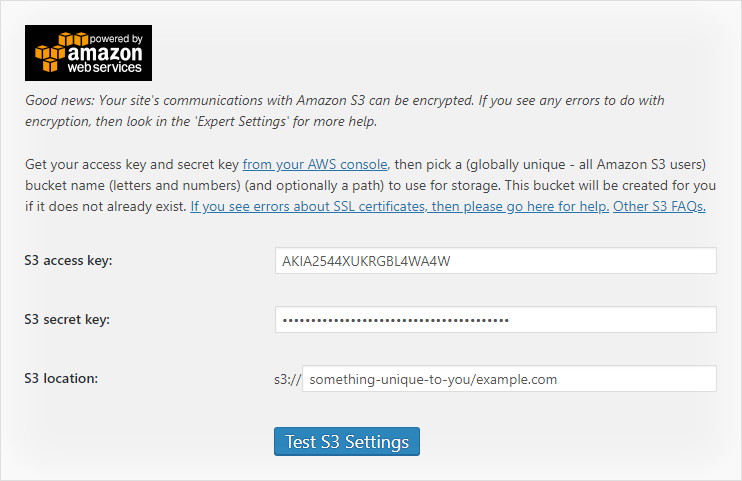
When you run the test, read the message carefully. It must look like this:
Success: We accessed the bucket, and were able to create files within it. The communication with Amazon S3 was encrypted.
As an optional extra, under Expert settings, you might want to do this:

It helps with manageability so you don’t have a zillion small ZIP files in the bucket. If you delete local backups, they won’t eat away your web server’s storage that’s better suited for speed rather than archival. You’ve successfully begun using Amazon S3 for WordPress backups! Pat yourself on the back. 🙂


Comments are closed.