

I was on a hunt for a service that has only one job: forward [email protected]’s incoming email to my regular Gmail address. We have a couple of domains and their corresponding professional-looking addresses. However, we don’t want to log in to multiple different mailboxes, especially not into some webmail provided by a cPanel hosting. Even switching between just Google accounts is a pain, now imagine doing that for every different address. As it turns out, Mailgun can forward emails to anywhere you want, so I’ll show you how! Update: Unfortunately, this approach is no longer free.
How I found Mailgun and what else I tried
I’ve owned domains for ten years, so I must have solved this task somehow before Mailgun, so you might ask: how? It’s been a bumpy ride for such a seemingly simple job. Storytime:
- I used G Suite that was free back then, but one of my domains can still use it. The old name was more telling (Google Apps for Your Domain). I log into my mailbox as if it were a Gmail address: I type the full email address including the domain into Gmail login. If your school or company uses custom-domain mailboxes where you login at gmail.com then you have already used this service. You can get unlimited Google Drive too, check their pricing for more info. For email forwarding, one could use the options inside Gmail settings, as usual.
- Forwarding from cPanel is usually provided by most hostings. If your domain’s nameservers are at Cloudflare, you need to make sure the MX records still point back to your hosting, so these can take effect. As we were leaving our cPanel host behind in May 2019, this is no longer a feasible option.
- Use the mailbox provided by a 3rd party and fetch via POP3 in Gmail. It’s cringy as emails tend to have a delay, and a separate mailbox is still maintained for you by someone like your hosting. Some domain registrars offer a free mailbox, though.
- You could use a 3rd party email hosting service. Zoho Mail comes to mind. You send and receive mail using their servers and use their interface for everything. These are usually so enjoyable; it would be a pity to use them as a simple email forwarder, though. Privacy-conscious individuals may prefer this way instead of Google.
- Not for the faint of heart, but one could use Amazon’s Simple Email Service (SES) that is not so simple for this. There is no “simple forwarding”, just sending. You’d to use a Node.js script for AWS Lambda to forward email. However, you are not supposed to send an email on behalf of the original sender, so you run into a limitation. You can only use the
Reply-toand not theFromheader for the original sender. So in this sense, it’s not a simple forward but a re-creation of the incoming mail, not good. The complexity of the implementation was a dealbreaker for me.
On Reddit’s r/devops I found this thread in which a comment pointed me to Mailgun. Then this article helped me, but if you find it raw (or require handholding to draw that owl), here is mine with more details! 🙂
Mailgun is an email sending service owned by Rackspace (managed cloud computing company). It’s a bit more than a newsletter solution. That “bit” allows us to receive mail through their system, but with everything ending up in Gmail.
Mailgun setup
First, you need to register. They need your card details (via Stripe!) for verification. Since sending emails is touchy, as in anyone could leverage their infrastructure to spam. When things are this serious, it’s understandable that they need payment information as an additional way to protect themselves.

Go straight to Sending -> Domains. As you can see, we already have some domains. Click Add New Domain.
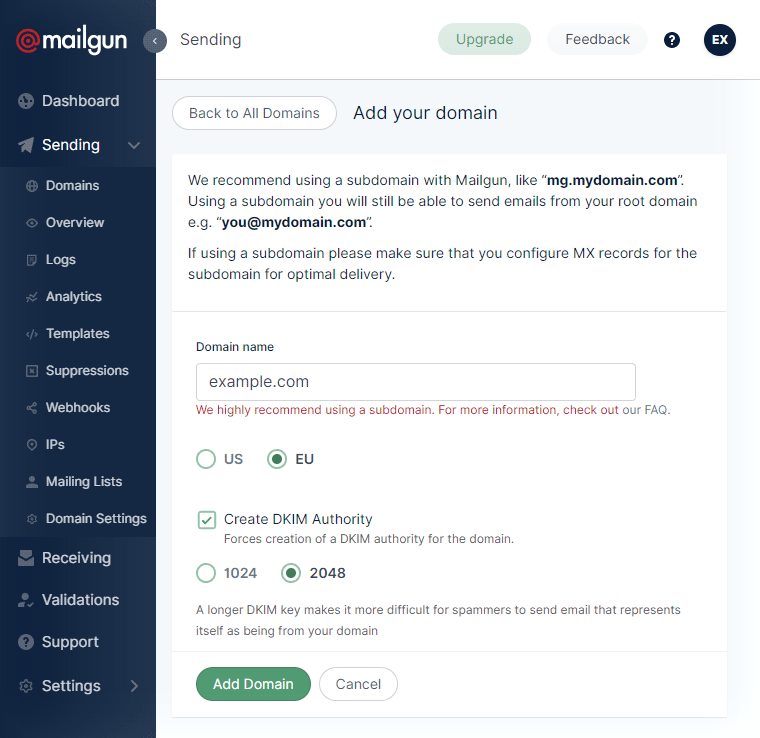
Feel free to ignore recommendations for using a subdomain, just add your domain as example.com, no www, no https:// or anything like that. Remember which region you choose here, as it’ll matter later (it’s for GDPR and geo purposes). As soon as you add a domain, you need to follow their steps to verify ownership. They’ll give you a CNAME, two MX, and two TXT records to add. See the next step on what to do with them.
Setup records on your Nameserver (Cloudflare?)
The screenshot shows how it should look like on Cloudflare (it’s what we use so I can only describe that). You reach this screen by clicking DNS in your domain’s settings. You get all the values from Mailgun:
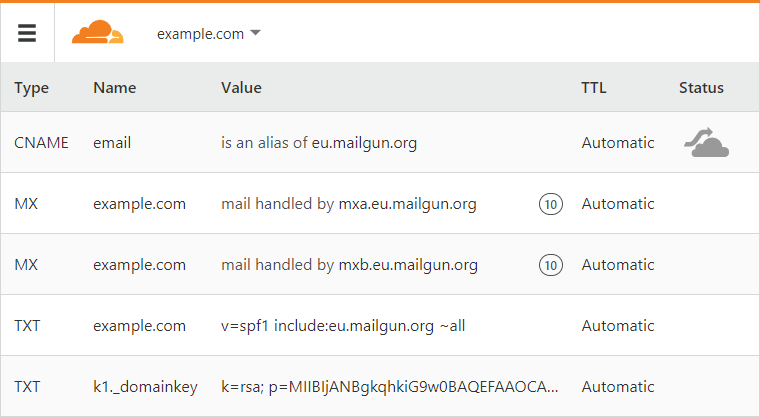
Make sure that pre-existing MX or TXT records that have something to do with mail or email are removed to avoid conflicts! There will be a brief period where the delivery system returns emails to senders or delays them. It’s unlikely that emails get lost, but do this quickly during a period of low email traffic, or better yet: when you just got the domain.
The actual forwarding in Mailgun
Wait until you get emails from Mailgun saying that the verification succeeded. You can click the button to Verify DNS records on the screen we left it at, but it’s not going to make it faster. Your domain is now added if you’ve done everything right! Now click on the Receiving menu item, and be presented with this emptiness:
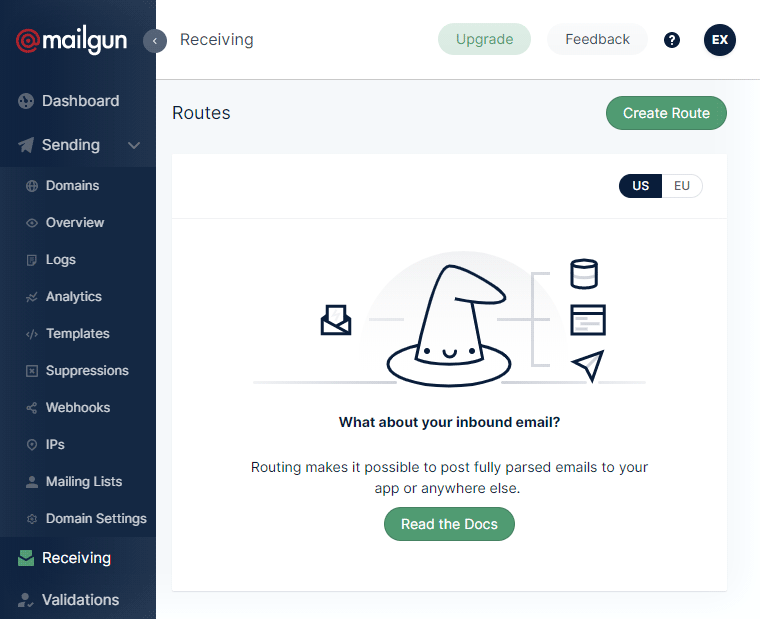
Before anything, choose your region (US or EU). Remember it from adding the domain? If you come back to this page later, you’ll only see the rules you created if you choose the correct region again. Since Mailgun is not an email inbox, you won’t see a list of emails in it.
Nevertheless, this is where Routing comes into play, so click Create Route button to get on with it! Here is the easiest Route, sufficient for many (click Edit route button at the bottom once done):
Forwarding for multiple recipients
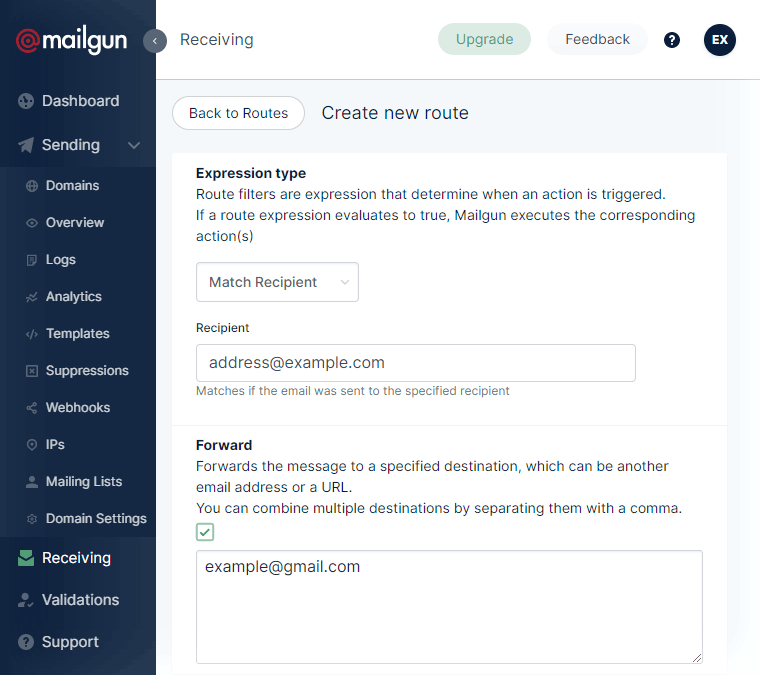
Watchful readers notice the Expression type:
- Catch All: Mails sent to anything before the @example.com will arrive at the forward destination. It might be an easy way, but one could expect more spam as bots could send to otherwise nonexistent addresses.
- Match Recipient: Forward email for one specific [email protected] only (shown above).
- Custom: This is the best of both worlds if you have a handful of addresses that should all go to the same Gmail.
The “code” to use for two addresses:
(match_recipient("[email protected]") or match_recipient("[email protected]"))And for three:
(match_recipient("[email protected]") or match_recipient("[email protected]") or match_recipient("[email protected]"))You see the pattern, I hope.
Test the forwarding
You might be skeptical that this worked, rightfully so. To test:
- Send a mail to [email protected] but not from the Gmail account that uses the forward address. Ask a friend, or use a different address.
- Check the Sending -> Logs in Mailgun. Every email that goes through them is visible there, hopefully as Accepted, Routed, Delivered. You can view the body of the emails if you want to, using the Quick View thingy. After that point, it’s up to Gmail to show the arrived mail.
Letting Gmail send through Mailgun
You already completed what you wanted. However, the article would not be complete without showing you the reverse. That is sending emails from your custom email address through Mailgun, using Gmail. It requires configuring Gmail to use the SMTP servers of Mailgun. The process is necessary for replying to the received mail, or else the reply goes out from your Gmail address.
Mailgun side
First, you need the Mailgun SMTP server credentials. To get them, go to Sending -> Domain Settings and choose your domain in the drop-down.
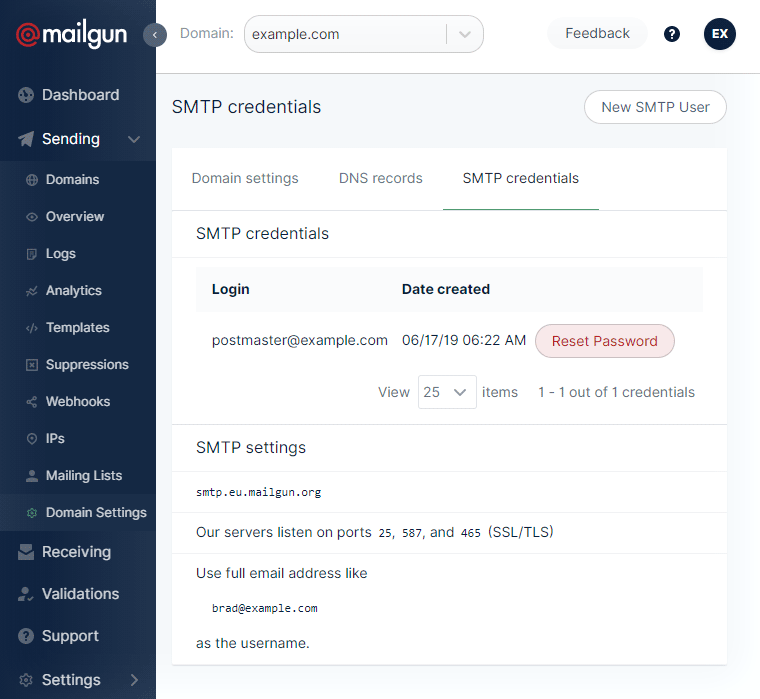
To get the password, click on that pink Reset Password button, and it’ll appear in a toast message, one time only. Finally, note these three things:
- The SMTP server is something like
smtp.eu.mailgun.org - The default user name is postmaster at your domain, such as
[email protected] - Password is what they just gave you
You can use these to send as any address on your domain, so feel free to re-use them. If you don’t like “postmaster”, then create a new one.
Gmail side
Go to Gmail -> Settings -> Accounts and Import and find the section called Send mail as. In it, click Add another email address.
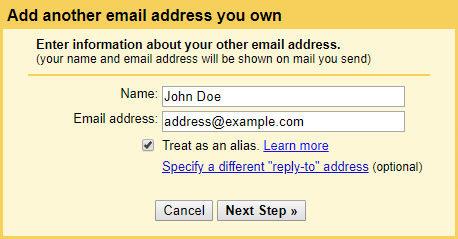
The Name is what appears as the sender for your recipients. The Email address is the one with your domain, like [email protected]. You need to follow the same 3-step process with every different address you have. Click Next Step.
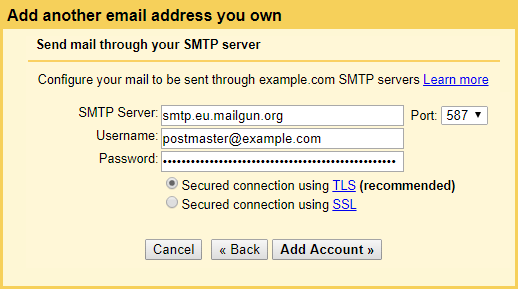
Add the noted data from above (postmaster email and the rest), use TLS and port 587. Click Add Account.
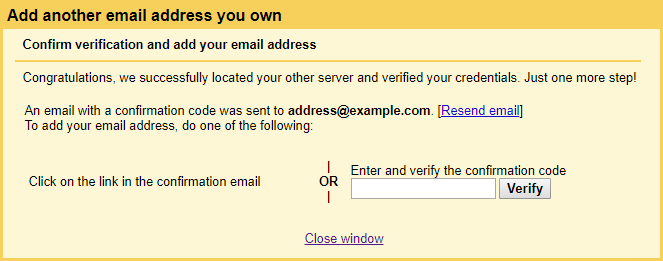
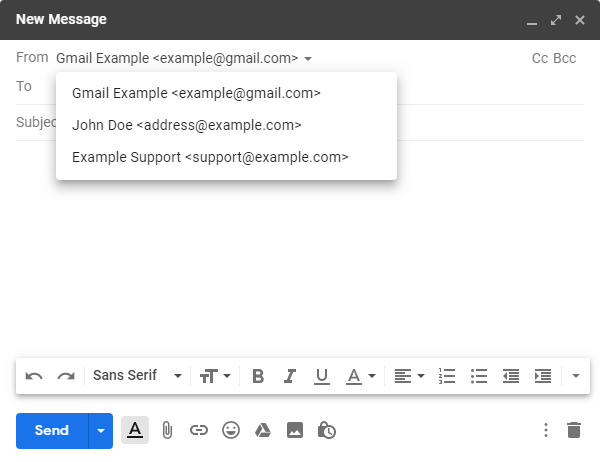
Wait for the verification email then click the link in it. You can choose from your additional email addresses when composing a message from now on. When replying to a mail sent to one of these addresses, Gmail will pick the appropriate “From” automatically. That’s it.
Disclaimer: We are affiliated with neither Mailgun nor Gmail. The screenshots are doctored to use the example.com domain that nobody owns, so it’s for demonstration purposes only.


Comments are closed.