
Amazon Web Services (AWS) is only intimidating until you get familiar with the 3-letter abbreviations. EC2 means Elastic Compute Cloud which, for our purposes, is a VPS. The instances don’t come with an email server, unlike on cPanel hosting. Subsequently, even if you manage to host WordPress, you’ll notice it can’t send anything. To send mail from Amazon EC2, you need SES, which is short for the Simple Email Service.
The process requires three things: adding your domain to SES, getting SMTP credentials, and finally telling them to WordPress. It’s not that complicated, and at least you’ll feel in control of your setup. It’s also considered free.
Note: This tutorial assumes you already use WordPress with AWS EC2, but it should work for any site/host. Locally-hosted sites are only eligible if you have a (sub)domain pointing to your installation. You could keep the record updated if your dynamic IP changes.
Adding your domain to SES
Begin here: SES Home in AWS Management Console. You’ll soon notice that SES is not available in every region. That is perfectly normal since email doesn’t have CDN-like requirements. Choose whatever is closest to you, we use Ireland.
When you click Domains, your interface might not be that decorated, but this is what to aim for:
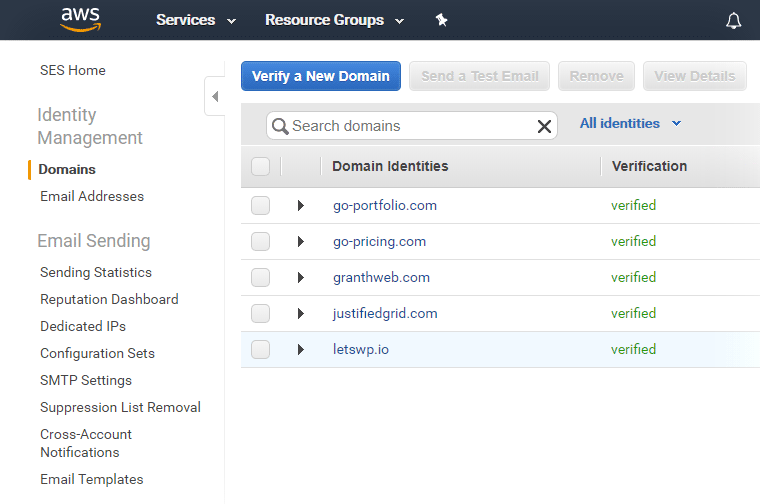
Click on Verify a New Domain to begin.
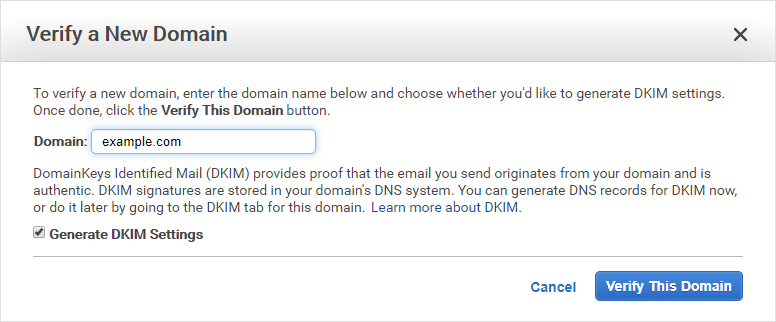
Verifying domain ownership
SES gives you three records:
- Domain Verification Record: It’s mandatory to send mail from Amazon. They need to know you have control over the domain you want to add.
- DKIM Record Set: Optional, but we use it. DKIM tells the recipient whether the person sending a message has access to the originating domain and the private key stored therein. Scroll down in that dialog. There are not two but three of these.
- Email Receiving Record: Don’t bother with this, as SES is not suitable for simple forwarding. Check Mailgun if you want to forward the incoming mail of your custom email address.
Add the TXT and the three (!) CNAME records to your Nameserver, which is Cloudflare in our case:
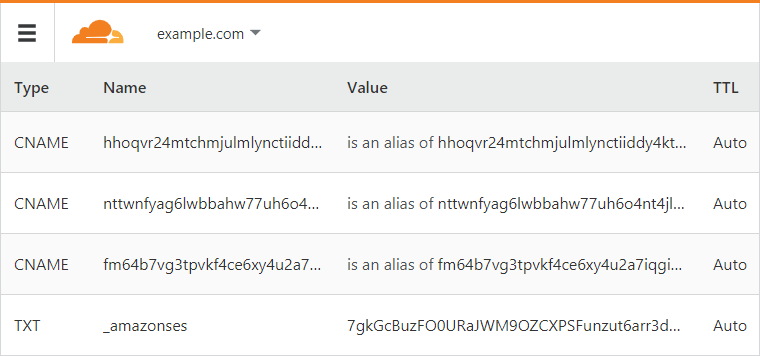
The verification will succeed after pending for a while. The result? You can send email from any email address on this domain. Yay!
Having your sending limits increased to get out of the sandbox
Contacting support might seem tedious, but it’s necessary for Amazon to protect themselves against spam accounts. You need to send a support request with wording similar to this:
We’d like WordPress to be able to send mail from multiple sites inside an EC2 instance. These will be people using contact forms to send mail to us, and WordPress system notifications about post comments and automatic updates or other transactional messages such as password recovery.
They’ll reply with something like this:
Thank you for submitting your request to increase your sending limits. Your new sending quota is 50,000 messages per day. Your maximum send rate is now 14 messages per second. We have also moved your account out of the Amazon SES sandbox. These increases take effect immediately in the EU (Ireland) region.
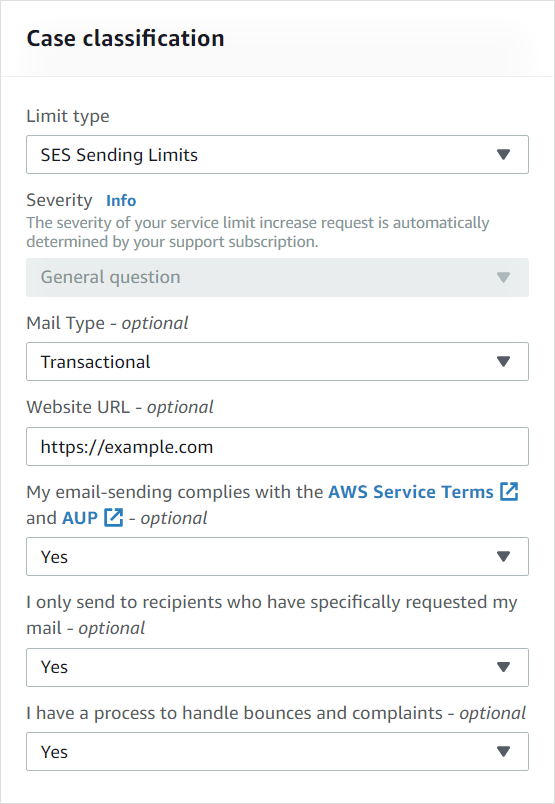
This process gets you out of the sandbox so you can send mail. To begin, click Request Increased Sending Limits and fill out the form according to your needs. For us, it was Yes to every question, and the increase was for Desired Daily Sending Quota = 300. Email type can be Other or Transactional, but it really depends on you so maybe don’t blindly copy us. I’m only here to let you know how we do it.
Getting SMTP credentials from SES
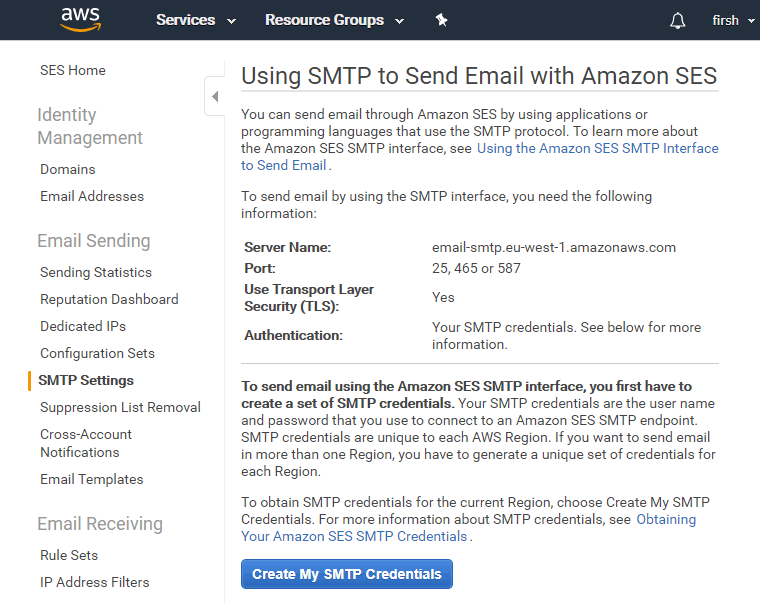
Click SMTP Settings and note the server Name (varies by region). Then Create My SMTP Credentials. This will take you to IAM (Identity and Access Management), which is the heart of security on AWS. Here you get to decide if one user is enough for all your sites/domains, or you prefer a unique user for each (that would be a best practice). I’ll show you the single user approach, which is OK for one site. However, restricting users to their single domain’s ARN is outside the scope of this tutorial.
The username you enter appears on Amazon IAM only, and it’s not even the one you use for the SMTP server. By default, it’ll come with rights to send email from any domain you add to this region. Click Create once you are content with your naming creativity.
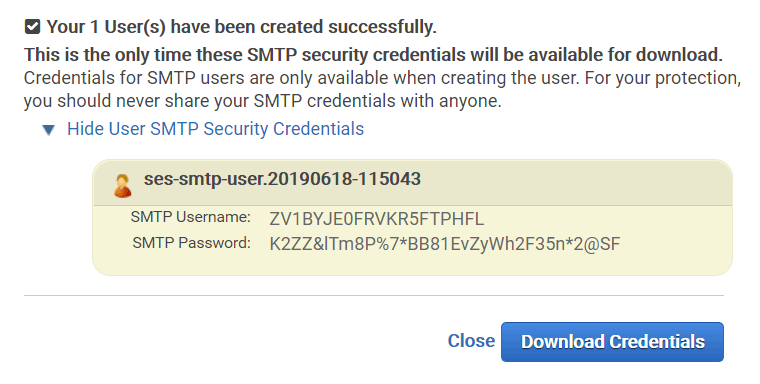
Make a good note of these two values (the screenshot is fake), as these are only shown once. You’ll need to add both of these to the PHP snippet (up next), and the name shown here will be your actual SMTP user, not the one you came up with, nor your email.
WordPress PHP snippet to send mail from Amazon
To include the snippet, add the following PHP to your WordPress sites:
/**
 * Use Amazon SES for outgoing email.
 */
include_once('/var/www/amazon-ses.php');
The path might differ for you! Place the file at a central location, above the document root of your vhosts. It can give any of your sites access to the email server, but you can also use the snippet directly without including. Finally, here it is (use amazon-ses.php as the file name):
<?php
// Amazon SES instead PHP mail.
add_action( 'phpmailer_init', 'use_amazon_ses' );
function use_amazon_ses( $phpmailer ) {
    $phpmailer->isSMTP();
    $phpmailer->SMTPAuth = true;
    $phpmailer->Username = 'ZV1BYJE0FRVKR5FTPHFL';
    $phpmailer->Password = 'K2ZZ&lTm8P%7*BB81EvZyWh2F35n*2@SF';
    $phpmailer->Host = 'email-smtp.eu-west-1.amazonaws.com';
    $phpmailer->Port = 587;
    $phpmailer->SMTPSecure = 'tls';
}
Don’t forget to change Username, Password, and Host to your values! This way, you reconfigure PHPMailer that WordPress uses under the hood, to send mail via Amazon. The hook is called phpmailer_init that gives you access to the $phpmailer object. Virtually anything in WordPress will use wp_mail() which relies upon the class mentioned above. We tested Contact Form 7, Elementor, and WordPress itself for sending – all work fine!
Alternative: Mailgun
I wanted to see if you could use Mailgun instead of SES since we already use Mailgun to forward incoming mail to Gmail. Of course, you can! Amazon does not limit you to their email service. So you don’t have to use SES, Mailgun is perfectly fine. Read all about Mailgun in the linked article, for both receiving and sending mail through them.
Just change the above snippet to Mailgun specific credentials. However, one caveat is that Mailgun gives you a different user/pass for each domain, so the central configuration model from above won’t work so well. Skip the include part, and add the snippet directly to the functions.php of your child theme for every site.
Test the email sending
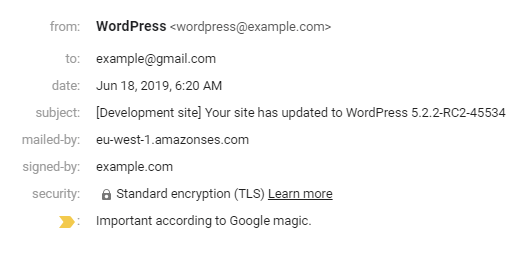
Log out from WordPress, and use the Lost your password? link from the login screen for a password reset email. Easy, huh? You can discard the email that’ll arrive from [email protected]; it’s only for testing. Finally, your WordPress site can send mail from Amazon EC2, and you know exactly how it accomplishes the task! Moreover, you’ll soon begin to receive transactional emails like this:


Comments are closed.