

Let’s get you into developing in the cloud! Shall we? Long gone are the days of installing a local XAMPP stack and writing code in Sublime Text. So what is my setup to code WordPress plugins? I’ll teach you how to start remote development with Visual Studio Code on Amazon EC2. Using AWS enhanced my working style. Why is it useful?
- All your code will exist in an environment that could closely match production.
- Things are super fast as you get to choose the physical location of the server, keeping the latency low (at least on AWS).
- You’ll be able to work from different machines since all your VS Code workspace settings are stored remotely.
- You can point a development domain at the server, so no more localhost, dynamic IP by your ISP, or port forward hassles to show your progress to clients and colleagues.
- Amazon servers are probably more robust than your computer.
- Bash commands from tutorials or GitHub will suddenly make way more sense and work well on the server. You’ll have a terminal and access to the AWS EC2 instance via SSH.
- If you are worried about the code not being at your fingertips… Regular automated backups offer peace of mind (you should be doing that on local development anyway).
Prerequisites
The preparation steps are longer than the actual setup for remote development. I’m assuming you are on Windows 10, and you are somewhat new to all this. Feel free to skip to parts that are relevant to you.
Amazon EC2 instance with OLS AMI
In a previous article, I pointed out that we use an Ubuntu-based Amazon Machine Image for WordPress that features the OpenLiteSpeed web server and all other necessary stuff. While the steps of this article work elsewhere, now you know what our original environment is. Henceforth I’ll assume you already have an Ubuntu server with at least 2GB RAM.
Linux user
You’ll need a non-root but a sudo user on the server. DigitalOcean nicely explains how to create one. In a nutshell, the following commands create an example user. As root or prefixed with sudo:
adduser examplePassword twice, Enter a bunch of times, then Y. After that:
usermod -aG sudo exampleKey pair for SSH
One part is the private key that resides in an extensionless or .pem file that has many lines. The client (your SSH software or VS Code itself) uses it to log in, and the server verifies it against its counterpart. That is the shorter, one-line public key, found in a .pub file, that goes into the authorized keys list we initiate like this:
su - example
mkdir .ssh
chmod 700 .ssh
touch .ssh/authorized_keys
chmod 600 .ssh/authorized_keys
ssh-keygen
Smash Enter 3x for that last one. To continue…
cat .ssh/id_rsa.pub >> .ssh/authorized_keys
cat .ssh/id_rsa
That’s it. Now you need to save the content of the private key as a file in Windows 10. Select the whole thing that looks like this:
-----BEGIN RSA PRIVATE KEY-----
...
-----END RSA PRIVATE KEY-----
Copy-paste it to a text file and save it as something similar to this:
C:\Users\Example\.ssh\aws-example-user.pemName it however you wish. Don’t forget to create the .ssh folder in your profile, the path of which includes the Windows user name.
SSH config file for Visual Studio Code
Create a text file with content similar to this:
# Read more about SSH config files: https://linux.die.net/man/5/ssh_config
Host aws-ec2
    HostName example.com
    User example
    IdentityFile C:\Users\Example\.ssh\aws-example-user.pem
Save it as an extensionless file called config in the C:\Users\Example\.ssh\ folder, same as above. To explain:
- Host (aws-ec2) is just a name that will appear in VS Code (as window title and connection indicator in the lower-left corner).
- HostName is the server’s host or IP.
- User is the Ubuntu username.
- IdentityFile is the path to the private key.
Windows 10 OpenSSH client
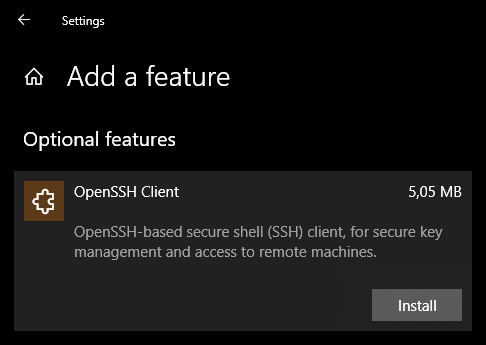
There is a built-in SSH client, but it used to be hidden by default. Search the Start Menu for Manage optional features. If you don’t see OpenSSH Client in the list, then click Add a feature. Find it among optional features and click Install.
Visual Studio Code (Insiders)
If you haven’t already, download VS Code (one of their installers). I chose Visual Studio Code Insiders edition, which is cutting-edge with more frequent updates, and a green icon. The remote development works just fine with the regular version, that comes with the blue icon.
Remote Development Extension Pack
Once you have VS Code, also install the Remote Development (by Microsoft) extension pack. After that, you’ll see it came with others that you can happily remove: Remote – Containers and WSL. Those are not needed. If you are stuck, more detailed information is in the extension’s details.
Remote Development with Visual Studio Code
Connect to server
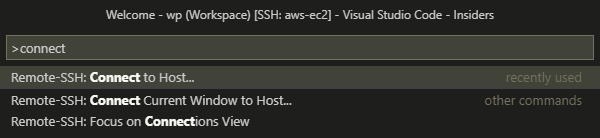
- Press the F1 key or click the dark orange button in the corner.
- Begin typing the word connect so the auto-suggestion Remote-SSH: Connect to Host… will come up and press Enter
- Choose the name you set as Host, such as aws-ec2. VS Code gets this from the extensionless config file you created.
- BAM! You are connected. Don’t worry; this happens in a new window… close the old one.
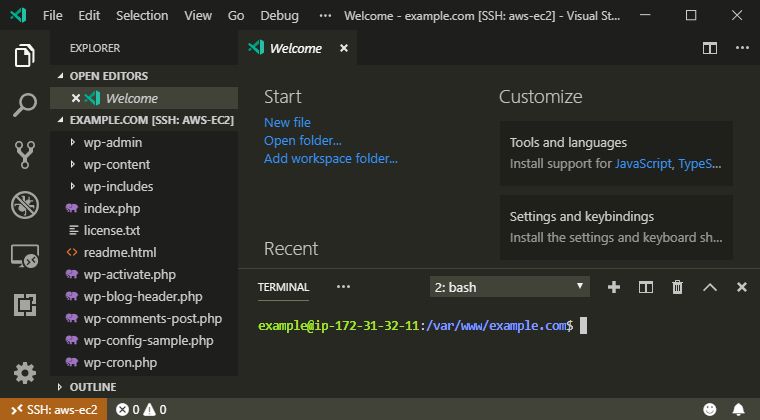
Eventually, the indicator in the corner will say SSH: aws-ec2. It shows the connection status. Waiting for this every time I begin working is a small price to pay for being able to develop in the cloud. Remote development with Visual Studio Code is anything but slow. I can’t tell if I’m working locally or not!

Create a workspace
In VS Code, the same thing is possible to achieve in multiple ways.
- Reach the Open folder… panel by either from the File menu, from the Start section on the home screen, or hit Ctrl+K and then Ctrl+O. Whenever you see these keyboard shortcuts after one another, it means you should press them in sequence.
- Navigate this panel to the WordPress folder (or directly to your plugin/theme you are developing). You can either click, type, or paste the path, such as
/var/www/example.com/then click OK.
Finally, see WordPress files loaded in the Explorer on the left.
To create a shortcut to other folders on your server, use the Add Folder to Workspace… feature. I like to have access to the entire WordPress tree in case I want to learn from the core files or inspect other plugins.
Now the only thing left to do is to save this view as a Workspace, so coming back to it is easy.
- To open the saving panel, choose File -> Save Workspace As… or hit F1 and type save work.
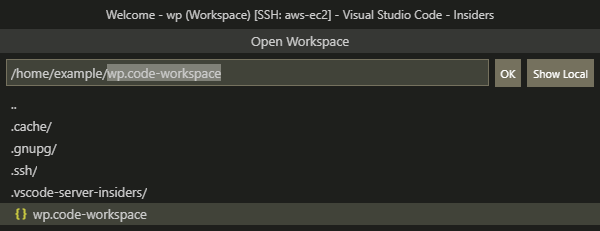
- Save it as
wp.code-workspaceor similar in a location for your project (the extension is optional, will get added anyway). - Close and re-open VS Code, and it’ll either automatically load it or make your project’s workspace available under Recent!
If you have other workspaces and need to switch between them, go to File -> Open Workspace… or F1, type open work and choose what you need from there. I prefer to keep these files outside of WordPress.
Optional extra, the symbolic link
If this is a WordPress plugin, I usually symbolic link the project folder (or better, the development/production build) to /wp-content/plugins/ folder. The left path is the real folder; the right one is the symbolic link.
ln -s /home/example/wp /var/www/dev.example.com/wp-content/plugins/my-pluginTroubleshooting
Recently, VS Code had a hiccup at connecting and required me to add this to the settings.json file (change the aws-ec2 to the name of your configured remote SSH host):
"remote.SSH.remotePlatform": {
    "aws-ec2": "linux"
}
An error saying “the process tried to write to a nonexistent pipe” went away promptly, and VS Code no longer fails to connect – yay!
Marvel at your creation and start coding
A working setup concludes my tutorial for setting up remote development with Visual Studio Code. I used to code in Cloud9, which is now also owned by Amazon, but it’s not this fast and awesome. Initially, it seemed cool as it ran in the browser, but it wasn’t very configurable. If you are reading this, you already know certain benefits of VS Code, and being able to use it remotely is truly a blessing. A huge community of developers is creating extensions that help you tune everything to your liking. Expect frequent updates! VS Code seems to be the trendiest editor since 2018, look how rapidly it grows:


Comments are closed.